Laptop keyboards are one of
the significant parts, used for providing input to the system. We know that
keys of the keyboard, either of laptop or desktop, are easily breakable; hence,
its extensive use may lead one or more keys to pop out. This will require replacing
the keyboard with another one. Other than this, there could be several reasons
for its replacement. If you are a user of Dell laptop and you need to replace
your Dell Laptop Keyboard, than
here is a guide for you.
Here we have taken Dell
Inspiron 1525 and have defined each and every step involved in the replacement
of its keyboard. However, keyboard replacement procedure is somehow similar of
all models of Dell laptops.
The steps are easy to follow,
you don’t need to hire a technician to replace your laptop keyboard; you can do
it yourself. Moreover, when you decide to replace the keyboard of your Dell
laptop, you can opt to order a new one online as well. There are a number of
online stores that are dealing in Dell parts and claim to have a stock from
original manufacturer. Hence, replacing and repairing your Dell laptop parts
have become easier.
Read on to learn how to
replace a Laptop Keyboard of a Dell Inspiron
1525:
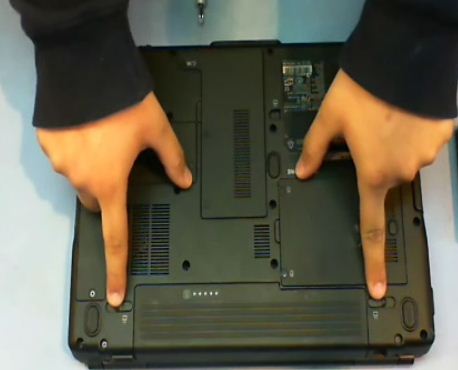
1. Remove Laptop Adapter
Turn off your laptop, unplug
the adapter if your laptop is on charge and remove the battery. You will find
the battery at the back of your laptop.
2. Remove the Battery
After removing the battery,
your next step is to remove two screws, which are in the battery section, basically
locking the keyboard bezel.
3. Unscrew your Laptop
Turn your laptop in such a
way that the keyboard is now facing you. Now with the help of screw driver,
lift the keyboard bezel from the right, cautiously. Once you have lifted it,
now keep on removing it by your fingers. But, you need to be careful, as there
is a thing ribbon cable, which is connecting button board to the motherboard. Remember,
it should not get disconnected from the motherboard.
After removing the bezel,
turn it over, with the cable connected. Now take out the screws, with the help
of the screw driver, which are holding the keyboard.
4. Remove Laptop Keyboard
Now you can lift the
keyboard. But, wait; the keyboard cannot be removed, as it is connected with a
flat ribbon cable to the motherboard. In order to do so, you will have to
unlock the connector and the cable will easily come out.
To unlock the connector, you
will have to lift the black plastic, which you can see on your Dell Inspiron
1525 and thus, the cable is free and you can remove your Dell Laptop Keyboard.
5. Replace your Laptop Keyboard
Now replace your damaged laptop
keyboard with the new one. Fix everything back in the same way, as you detached
and finally you are done with the replacement process.